How to Use Vidu Studio for Free
Video content is everywhere, but creating it doesn’t have to be expensive or hard. Meet Vidu Studio, a game-changing AI platform that makes stunning video creation accessible to everyone. And the best part? You can use it for free! Let’s explore how to use Vidu Studio for free.
January 02, 2025 10:35
Overview of How Vidu Studio Works
Vidu Studio makes video creation simple and fun with AI! You can turn text or images into videos in three ways: text to video, image to video, or by using the reference to video feature.
Just describe the video you want, upload an image, or let the "inspire me" option help you craft a prompt. Choose your video style like "general" or "animation" and set the length.
Longer videos require a subscription, but free monthly credits are available to get you started. The AI generates your video, and you can enhance quality with the "upscale" option or tweak it further if needed.
How to Use Vidu Studio for Free: Setting Up Your Free Account
The journey begins with the simple step of signing up for a free account. Head over to the Vidu Studio website and click on "Sign in" in the top right corner. You'll be presented with two convenient options to create your free account:
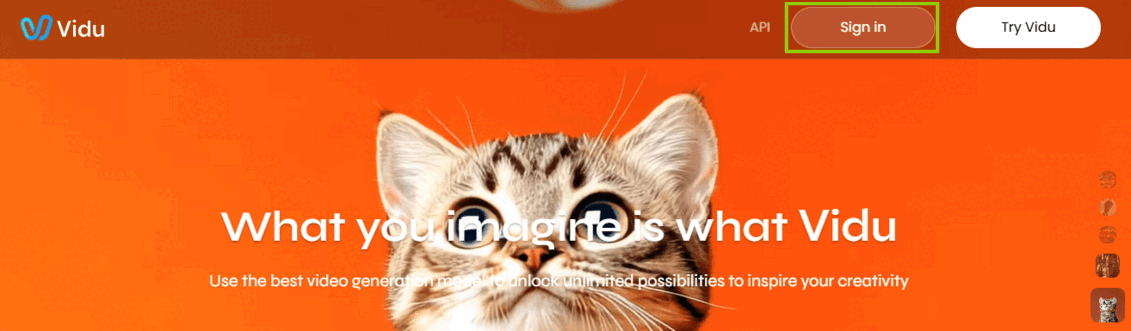
Google Account: Seamlessly connect using your existing Google account.
Email Address: Register with your preferred email address.
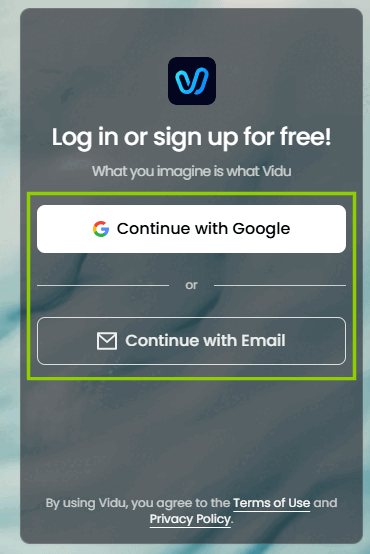
Choose the method that suits you best and follow the straightforward prompts to complete the registration process. Congratulations! You're now officially a member of the Vidu AI Studio community and ready to create videos.
Navigating the Vidu Studio AI User-Friendly Interface
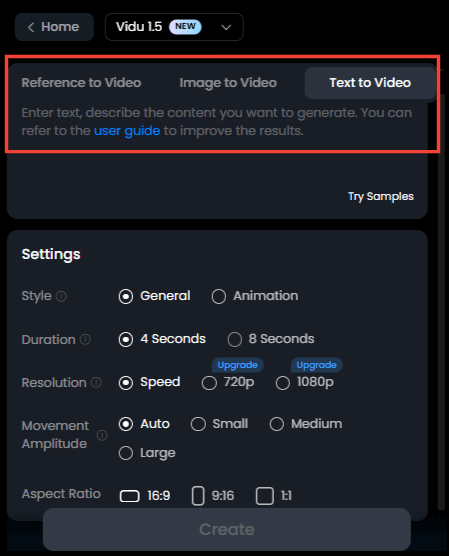
Before we jump into creating videos, let's take a moment to familiarize ourselves with the intuitive Vidu Studio interface. Upon logging in, you'll land on the main page, where you'll find two prominent options:
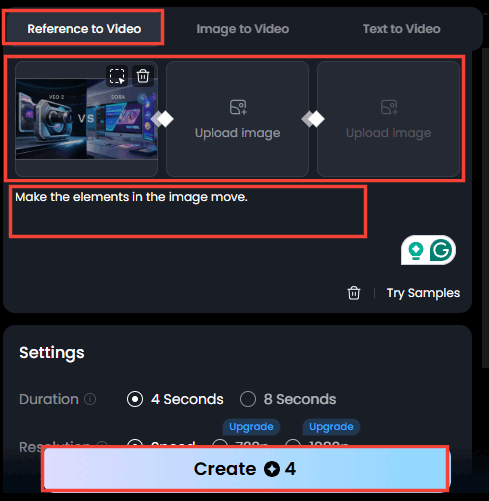
Reference to Video: Upload an image of a subject, and Vidu generates videos featuring that subject in various scenes.
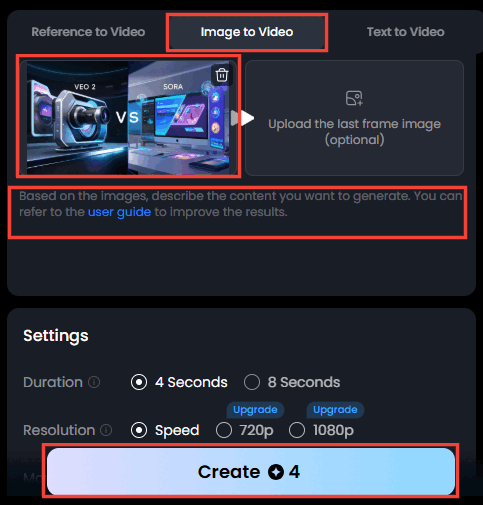
Image to Video: Transform static images into dynamic videos by animating the content of your photos. If your images are not clear enough to animate, you can enhance them to get the best quality.
Text to Video: Convert written descriptions into engaging videos by inputting text prompts, and Vidu brings your ideas to life.
It's important to note that while Vidu Studio AI offers generous free access, there is a monthly credit limit. The free plan provides around 80 credits per month. Each video creation consumes credits, with shorter videos requiring fewer credits. Monitor your credit usage to ensure you can continue creating without interruption.
How to Use Vidu Studio for Free: Creating Videos with Text and Images
Now comes the exciting part, creating your very own videos! Vidu Studio App offers three primary methods for video creation: text to video, image to video, and reference to video. Let's explore each approach in detail.
1. Text to Video: Transforming Words into Moving Pictures
Imagine creating videos solely through the power of your texts. With Vidu Studio's text to video feature, this becomes a reality. Follow these simple steps to bring your textual visions to life:
Input a Text Prompt: Start by entering a descriptive prompt that conveys the video you want to create. The more specific and detailed your prompt, the better the AI can understand and generate your vision. For instance, instead of simply writing "a cat," you could write "a fluffy tabby cat chasing a laser pointer across a living room floor."
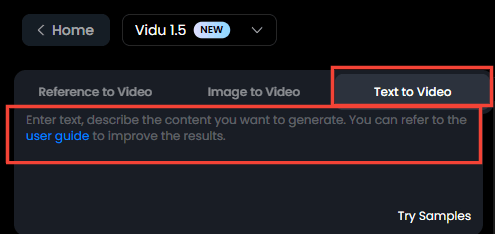
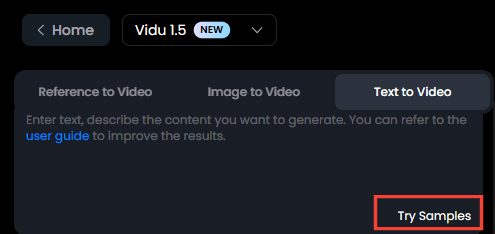
Seek Inspiration: If you're feeling a bit stuck or need a creative idea, Vidu.studio has got you covered! Click the "Inspire Me" button to access a curated selection of example prompts that can spark your imagination and guide you in crafting compelling prompts.
Adjust the Settings: Before hitting the create button, take a moment to customize the style and aspect ratio of your video. You can choose between two styles: "General" for a realistic look or "Animation" for a more stylized and cartoon-like aesthetic. Regarding duration, you can opt for either 4 seconds or 8 seconds. However, keep in mind that 8-second videos require an upgrade to a paid subscription plan.
Hit "Create": Once you're happy with your prompt and settings, click the "Create" button and watch the magic unfold! Vidu Studio's AI engine will easily process your input and generate your video in a matter of seconds.

2. Image to Video: Breathing Life into Still Images
Have a captivating image you want to transform into a dynamic video? Vidu Studio's image-to-video functionality makes this process seamless and intuitive. Follow these steps to animate your favorite photos:
Upload Your Image: Begin by uploading your desired image into the designated area within the Vidu.studio App interface.
Add a Motion Prompt: Once you've uploaded your preferred photo, it's time to guide the AI by providing a motion prompt. This prompt should describe the movement or action you want your image to perform. For instance, if you uploaded an image of a person standing, you could write "The person walks forward, waving their hand." The AI will then interpret your prompt and generate an animation that brings your image to life.
Generate Video: With your image uploaded, and motion prompt in place, click the "Create" button to initiate the video generation process.
3. Reference to Video
If you want to create a video using Vidu Studio's Reference to Video feature, follow these steps:
Initiate Video Creation: Select the "Reference to Video" option.
Upload Reference Image or Images: Click the upload button to add an image or images of the subject you want to feature in your video.
Describe the Desired Scene: In the prompt box, enter a description detailing the scene or action you want the subject to perform.
Generate the Video: After writing the description, click the "Create" button. Vidu Studio will process your inputs and generate a video aligning with your specifications.
Polishing Your Videos: Upscaling for Enhanced Quality
After your video is generated, you might notice that the initial quality is somewhat low. Don't be worried! Vidu Studio provides a handy "Upscale" feature to enhance your video's resolution and clarity. To upscale your video:
Click "Upscale": Locate the "Upscale" button below your generated video and click it.
Choose Upscale Type: You'll be presented with a popup asking you to confirm. Click “Confirm” to upscale. Keep in mind that upscaling also consumes credits.
Maximizing Your Free Experience: Tips and Tricks to Get the Best Out of Vidu Studio
To make the most of Vidu Studio's free offerings, consider these helpful tips and tricks:
Experiment with Prompts: Don't be afraid to get creative and try out different prompts and image combinations. The more you experiment, the better you'll understand how to craft effective prompts and achieve the results you desire.
Use Vidu Credits Wisely: Remember, the free plan comes with a limited number of Vidu Studio free credits per month. Plan your video creation projects and prioritize your ideas to optimize your credit usage.
Consider Upgrading (If Needed): If you find yourself needing longer videos, more credits, or access to additional features, exploring Vidu Studio's paid subscription plans might be worthwhile. These plans offer greater flexibility and unlock the platform's full potential.
Conclusion
Vidu Studio AI free tool empowers everyone to embrace the magic of video creation without financial barriers. By following the steps in this guide on how to use Vidu Studio for free, you can explore the platform's intuitive interface, understand how Vidu Studio works, experiment with text and image inputs, and enhance your videos with upscaling, all for free!
Reveal your creativity, bring your video ideas to life, and share your stories with the world, all thanks to the power of Vidu Studio.

Lahaga Aondowase
I'm passionate about empowering creators through the power of AI. As the founder of AI Video Tools Pro, I aim to banish the time-wasting struggle of finding the perfect AI video tools for your content creation.
User Comments (0)